Tuesday, November 26, 2013

Fire and Ice Blog Hop!

 photo 1113FireIce_HopBadge_rsz_zps4fd1904e.jpg

Keep hopping to see what

Deb Weller

http://debduzscrappin.blogspot.com/

has created! Happy Thanksgiving and I hope to participate next month!

Read More »

Thursday, September 5, 2013

Day 5 #theidearoom Photo a Day Challenge

Empty. 


I try to drink 64 oz of water a day. The first 24 oz is hard to swallow! It's 3:00 and I just got it down (rolling my eyes). 
Read More »

Saturday, August 17, 2013

#augustbreak2013 day 17

Touch...up! 

I washed that gray right outta my hair! 


Read More »

Friday, August 16, 2013

#augustbreak day15


Read More »

Thursday, August 15, 2013

#augustbreak2013 day 14

Stillness.

Aw, cher t’bebe...got his shots yesterday and this is the only way he would sleep! 


Read More »

Wednesday, August 14, 2013

#augustbreak2013 day 10

Red...OPI red! 


Read More »

Friday, August 9, 2013

#augustbreak2013 day 9

Taste ( of Florida)...Malibu and pineapple and Wally Lamb on my Kindle. Nice breeze and a rented chair and umbrella. 


Read More »

Thursday, August 8, 2013

#augustbreak2013 day 8

selfie...


Relaxin' on the porch in the Florida sunshine. 


Read More »

Wednesday, August 7, 2013

#augustbreak2013 day 7

skyline.


Read More »

Tuesday, August 6, 2013

#augustbreak2013 day 6


diagonals


Read More »

Monday, August 5, 2013

#augustbreak2013 Day 5

Close up.


Baby bell and olive tampenade hummus...I feel very Roman! 


Read More »

#augustbreak2013 day 4...

love. 


Roadtrippin' with my boys! Mom and Dad were the backseat drivers! 


Read More »

#augustbreak2013 day 3

yellow...


Read More »

Friday, August 2, 2013

August Break 2013 Photography Challenge Day 2

#augustbreak2013

                Circles....


As I sit in the coffee room on my break, eating my Fage no fat yogurt, this is staring back at me.

Day 5 of Weight Watchers, and I am being tested!

Read More »

Thursday, August 1, 2013

The #August Break 2013 Photography Challenge, Day 1


Yogurt...it's what's for breakfast!


I love just about anything with coconut in it...food, lotions, shampoo, soap. I even put a little coconut oil in my coffee!
Read More »

Wednesday, July 31, 2013

Wisteria Blog Hop!


Welcome to my stop on the Club Scrap Wisteria Blog Hop! If you started on the Club Scrap Creates Blog, you are in the right place. If not, keep in mind that you can access the whole list of participants from there at any time.

It is after 10PM and I am just finishing my project for the hop. That is the story of my life! I always seem to get my creative bursts at the last minute. This year I have “discovered” sewing. I bought a new sewing machine last fall and since then I have been on a roll. (My blog posts are full of my latest creations.) My recent obsession is learning how to embroider. I was tooling around on YouTube for embroidery videos and found some tutorials on free motion embroidery using a sewing machine. I read my new machine’s manual and turns out all I needed was a darning or embroidery foot for my machine. Mine happened to come with one, so I played around with it. The manual wasn’t that helpful, “insert fabric under the presser foot. Lower the presser foot and begin moving the fabric following your design lines.” This is what happened…

004

After watching a ton of videos, I found some awesome tutorials on free motion embroidery by Patsy Thompson on her YouTube channel. Step one was to pull the bobbin thread to the top for correct tension (rolling my eyes).


Can I tell you I was absolutely giddy when I got everything to work! I practiced embroidering all my scraps of fabric! My 15 year old son watched over my shoulder for a few minutes and I invited him to try it out. Check out the lower left scrap, he wrote his name (Jake)…in cursive. It took me weeks of trial and error to get that scribbling down and he just sat down and did it!

002   

What I really like about this technique is the imperfection of the stitches. I get so caught up in having everything just right and “perfect” that I get overwhelmed and forget to have fun. Free motion embroidery is good therapy for that because it will NEVER be perfect!

When I got my digi kit and saw the Voltaire quote stamp image I knew what I wanted to do for my project. I designed an embroidery pattern in PSE and printed it on some muslin fabric.

Embroidery screen shot

I found a great tutorial printing on fabric using an inkjet printer on instructables.com. I ironed a piece of freezer paper to the back of my fabric and trimmed it in my Tonic printer to 8.5*11. This gives your fabric some stability to be able to run it through the printer.

001  003004

Then I loaded it in my printer and voila!

009 010

On to the free motion embroidering… AND I remembered to pull my bobbin thread to the top…

022

but I forgot to put stabilizer on the back for support. It was okay, but the fabric buckled in places. I had to print another piece of fabric (I’m working on imperfection). On the advice of Patsy Thompson in her video, I got a glass of wine, put on my quilter’s gloves and started free motion embroidering!

016

This is what happens when you wait til the last minute and get tired!

018

Here’s the finished piece. I think I am going to frame this to put on my bedside table. I thought about making it into a pillow, but I really should have treated the fabric with Bubble Jet Set and Rinse in case it had to be washed. I can always make another, the possibilities are endless!

022 023 024

Your next stop is Deb at http://debduzscrappin.blogspot.com/. Refresh your coffee and hop over to check out what she has to share!

Read More »

Monday, July 29, 2013

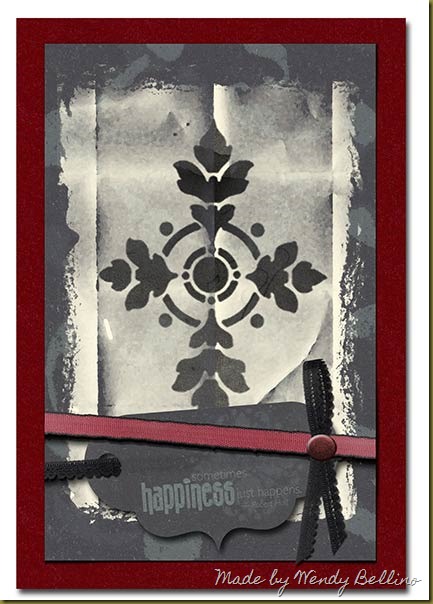
Faux art media digi cards!

I just participated in +Club Scrap's PSL Summer Camp 2013. The challenge for last week was make your own cluster embellishment. I strive to make my digi creations look "real" and had fun with this. The red and black card was from Club Scrap's Study in Red digi kit. I used a mask for the painted cream background and used a watercolor brush to "paint" the cross element. The ribbons and tag were elements in the kit that I used to make my cluster.

Study-in-Red-Card


The pink and blue card was fun....I love to make paper cards using my Cricut, so I made a faux Wild Card cartridge digi card. I used the rounded rectangle tool to draw out the shape and skewed it. I duplicated it and made the top layer and resized. I cut out a circle on the top layer to add the 45 record adapter to the bottom layer for dimension. I played around with the drop shadow for the spinner. Liking the effect.  All paper and elements from this card were from Club Scrap's Cruisin' kit.

Cruisin-card

Read More »

Wednesday, July 10, 2013

Club Scrap Blog Hop July 31!

Read More »

Saturday, June 29, 2013

Google+ and Blogger…


I recently updated my Blogger profile to Google+ (G+) and I am still working out the kinks.  I just participated in Club Scrap’s monthly blog hop and received an email from a reader who couldn’t respond to my “no-reply blogger” comment that I left on her blog. I also read a comment about the blog hop  in the Club Scrap Community forum. The reader didn’t comment on three blogs because she was asked to join G+ and wasn’t comfortable doing that. I did some research on the Google/Blogger integration and this is what I discovered. 

First of all, readers will need a G+ page or profile to comment on your blog if you have updated to G+. When you enable G+ comments, existing Blogger comments will stay on your blog. G+ Comments lets you bring the following conversations together in one place, right under your blog post:

  • Comments made on your Blogger blog post
  • Comments on the blog post that you’ve shared to G+
  • Shared content on G+ that links to your blog post

Basically you are getting more bang for your buck because you can engage with more of your readers. So, joining G+ and enabling G+ comments on your blog is a win win situation.

I also found a solution to the “no-reply blogger” email address  on Fluster Buster. That was an easy fix.

Since I already had the Google profile, I jumped in and made a page. I didn’t like the backgrounds on G+, so I made my own profile cover photo. Cypress North posted a “Guide to the New Google Plus Cover Photo Size, Inspiration & Tips” and provided .psd templates to download.

This is my new cover photo for my G+ profile page that I designed in Photoshop Elements…

(Click photo)Chalboard Google   profile_edited-1

Read More »